Hi, friends, as I mention on my earlier post that today Linux is also going to popular OS. So the Computer vender generally ships preloaded OS like Vista, LINUX etc to the laptop or Desktop, and only give a single partition for work on which already system files are Installed with it they generally hide one partition called recovery Installation . If you get any problem get attacked by virus then with a single button you get back to your previous stat at which you purchased your PC. But what about your precious data , well it is lost.
If you get Windows as a Preloaded OS then you are very Lucky because you get many stuff or software related to create /resize partition (on internet some are free) , which can make a room ( resize your existing partition and make new partition) to save your data. And by chance you get Linux like Fedora red hat SUSE etc then you definitely suffer more for that I already mention what to do, for detail see my previous Resizing the Preloaded Operating system
Now come to the point If you try to resize the LV
follow these steps for easy configuration:--
- Boot Fedora Installation CD/DVD at rescue mode
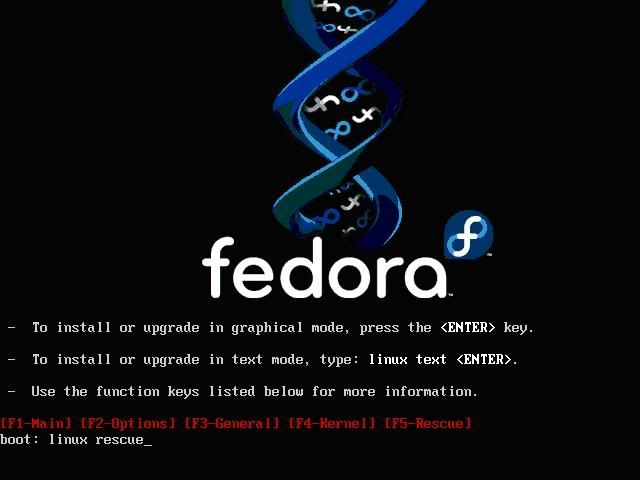
It take some time to go to rescue mode after boot , select keyboard layout and language, After that it ask you to choose the “NETWORK SETUP” so just skip it because there is no need to setup Network
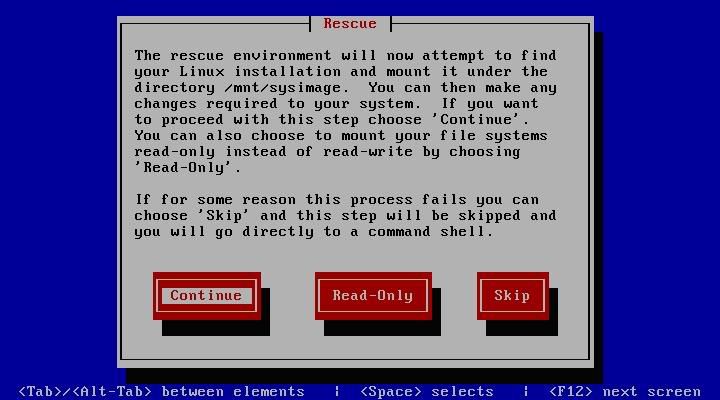
New screen appear, which Inform you that “ The rescue environment will now attempt to find your Linux installation and mount it under the directory /mnt/sysimage” . Click “CONTINUE ” 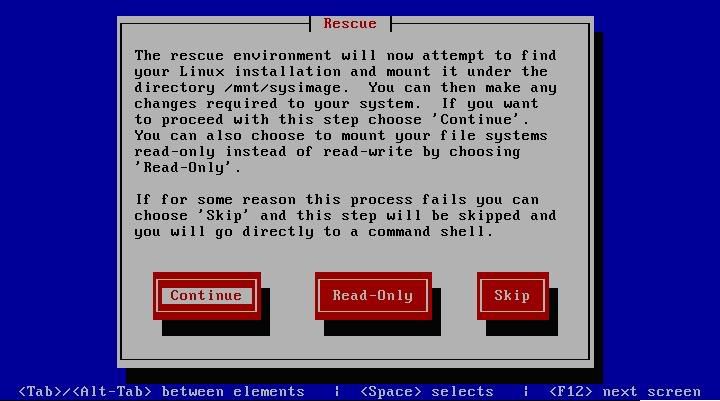
- If everything is Ok , then you get the screen like this
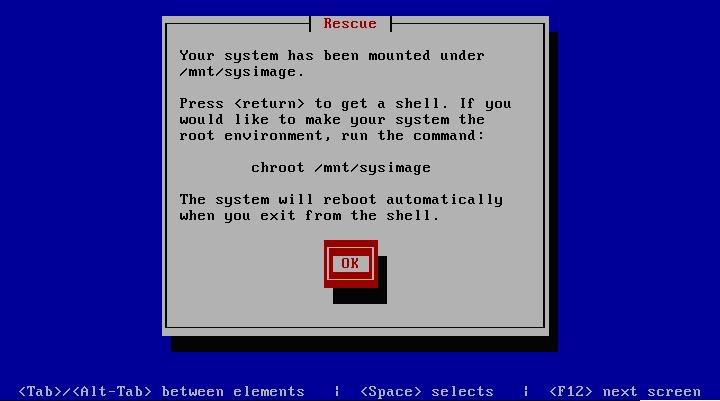
after clicking on “ok” you get Bash shell
Now type the “mount” command to see the file system mounted on mnt/sysimage, also use df –h to see the disk usage , write down the results because you really need that when you take next steps like volume used etc
#mount
#df –h
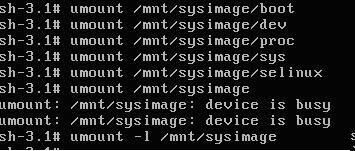
/dev/VolGroup00/LogVol00 is the LV group partition which you have to shrink so write down its size used space etc.Unmount everything under /mnt/sysimage and finally /mnt/sysimage itself. Use the "-l" option for umount if you get complaints about busy devices.
#umount /mnt/sysimage/boot
#umaunt /mnt/sysimage/dev
#umount /mnt/sysimage/proc etc
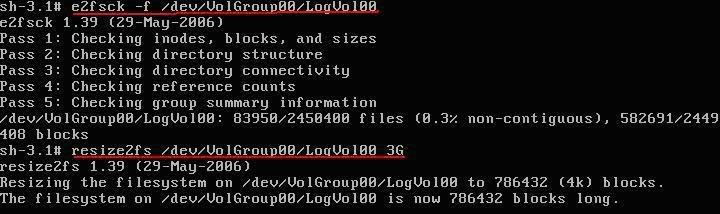
Now execute command “e2fsck –f” (e2fsck is used to check a Linux
second extended file system (ext2fs))and “resize2fs” with the size till
you want your new LV
#e2fsck –f /dev/VolGroup00/LogVol00
#resize2fs /dev/VolGroup00/LogVol00 3G
Remember one thing LVM allocates space in 32MB chunks by default, the new size must be a multiple of the LVM extent size. Leave 20% free space on the volume so that all the files work well. Don’t shrink full file system.
Now type “lvm” and then execute the command “lvresize”
Lvm>lvresize –-size 3G /dev/VolGroup00/LogVol00
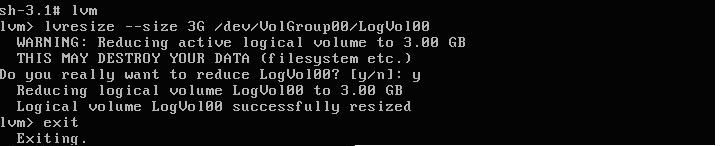 3G means you want to shrink the partition till it becom 3G, you can use your own value like 20G , 10G as you want.
Now write "exit" and then again "exit". Here you done half of your work. At the LV group you created a free space. If you want only till that step then you leave it here, but if you want to make free space outside the LV group to install other OS then continue.
After writing “exit” at Bash shell system restart, so you have to boot it into rescue modea gain as mention above but now skip the step when it says it want to attempt to mount the system in mnt/sysimage directory.
Now you get Bash shell again, activate the LVM by the command “lvm vgchange –a y”
#lvm vgchange –a y
- and execute command fsck –fc on /dev/VolGroup00/LogVol00 to update /etc/fstab directory.
#fsck –fc /dev/VolGroup00/LogVol00
- If you have knowledge of Linux then there is a swap file system which is created after VolGroup00/LogVol00 that is VolGroup00/LogVol01 , so to make new room you have to first remove it and then again make it after the new LV. Don’t worry you just temporarily removing it
- Execute command “lvm lvs”
#lvm lvs It shows you the exect size of your swap file say it is 1.59G
Execute command “lvm lvremove” , “lvm lvcreate” on /dev/VolGroup00/LogVol01
#lvm lvremove /dev/VolGroup00/LogVol01
#lvm lvcreat ---size 1.59G –name LogVol01 VolGroup00
#mkswap /dev/VolGroup00/LogVol01

Now Check how much you can shrink it by executing the command “lvm pvs”
#lvm pvs
Write down the result
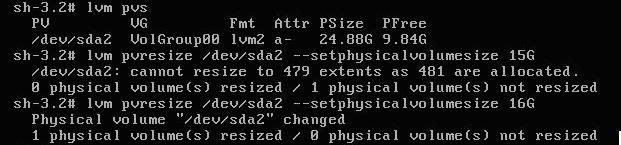
Now you can resize your /dev/sda2 physical volume to final size in between anything 10G to anything between 24.88G .
Execute command “lvm pvresize”
#lvm pvresize /dev/sda2 --setphysicalvolumesize 16G
If command fails then that means your shrinking size is too small because there are still allocated extents other then swap, move it like this.
Execute command “lvm pvs units s” ‘s’ for sectors it will display the partition size in sectors take note of PSIZE and execute parted to display the partion size in sectors (starting and ending ) and make note of that
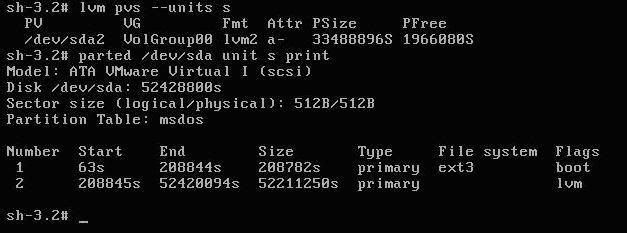
Now here you already free the space within LV group, and shrink the boundry of the lv group, so you have just take start sector of LVM and reduce the end sector to shrink it but make safty mark after 64MB (131072 sectors) .
Then execute the commands “fdisk –l /dev/sda” and finally fsck –fc to update /etc/fstab
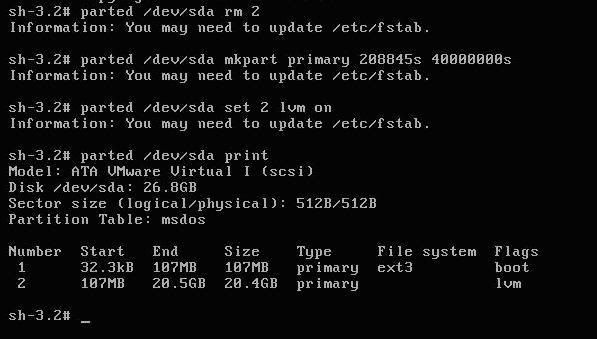
I get reference from these two posts so read these posts if at any point you not understand - Execute command “parted”
#parted /dev/sda rm 2 (2 is s/no of partition)
- And recreat the partition like this
#parted /dev/sda mkpart primary 208845s 40000000s
#parted /dev/sda set 2 lvm on
#parted /dev/sda print
Then execute the commands “fdisk –l /dev/sda” and finally fsck –fc to update /etc/fstab
#fdisk –l /dev/sda
#fsck –fc /dev/VolGroup00/LogVol00
Now you got space as you desire, It’s a example you can put your own values to make your desire partition space .
No comments:
Post a Comment